
Introduction
In today’s fast-paced digital world, film photography might seem old-fashioned. But for many, it’s anything but outdated, it’s magical. There’s something special about holding an old-fashioned camera, hearing the click of the shutter, and waiting to see the images that come to life on film. While digital cameras show you the photo right away, film slows things down and brings a deeper connection to photography.
One key step in using film is processing it, turning the exposed film roll into photo negatives you can scan or print. This article will help you understand how to process film, why it’s important, and how you can do it at home with just a few tools.
You don’t need a darkroom or a fancy setup. This guide is simple, beginner-friendly, and perfect if you’re curious about trying film photography yourself. Whether you’re using 35mm, black and white, or color negative film, we’ll walk you through it all step by step.
What Does “Process Film” Actually Mean?
At its core, process film means developing the images captured on your roll of film so they can be seen. This involves using chemicals to make the hidden photos on the film visible and permanent.
What happens during film processing?
- The process film contains light-sensitive crystals.
- When exposed to light, these crystals capture a “latent” (invisible) image.
- Through a chemical process, this image becomes visible on a negative strip.
Why process at home?
- Cost-efficient compared to labs.
- Complete creative control over your results.
- A rewarding hands-on experience.
Common types of film to process
- Black and white film: Easiest for beginners.
- Color negative film (C-41): More complex but very common.
- Slide film (E-6): Produces positives instead of negatives; for advanced users.
Process film is both science and art, a unique blend of chemistry, precision, and personal style. Once you understand how it works, you’re one step closer to unlocking the full magic of analog photography.
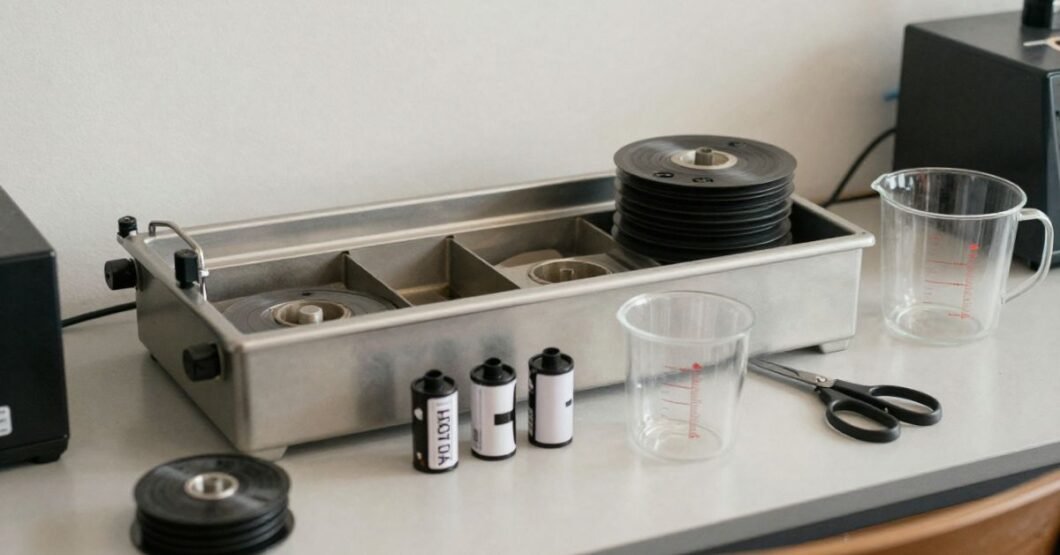
Tools and Supplies You Need to Process Film at Home
To process your film, you’ll need some basic tools. Think of it like setting up a mini lab in your bathroom or kitchen.
Basic supplies
- Developing tank (light-tight container)
- Film reels (to load film onto)
- Measuring jugs or cylinders
- Thermometer (for checking chemical temperature)
- Timer or watch
- Scissors and bottle opener (to open film canister)
- Clothespins or film clips
Chemicals needed (for black and white film)
- Developer: Brings out the image on the film.
- Stop bath: Stops the development process.
- Fixer: Makes the image permanent.
Optional but helpful
- Film changing bag (if you don’t have a dark room).
- Squeegee or soft cloth (to remove water after rinsing).
- Permanent marker (to label chemicals).
Essential Tools for Home Film Development
| Tool | Use |
| Film Developing Tank | Holds film for chemical developing |
| Film Reels | Guide film into tank for even chemical coverage |
| Measuring Cylinder | Measures and pours chemicals accurately |
| Thermometer | Ensures correct chemical temperature |
| Timer | Tracks processing time |
These tools are all reusable, and the initial investment isn’t huge. With care, one kit can last you years.
Preparing Your Workspace Before Film Processing
It’s crucial to get your place ready before you start. Clean, organized spaces make the process smoother and avoid mistakes.
Choose a workspace with
- Good ventilation (especially when using chemicals)
- A source of clean water (for washing)
- Flat surfaces to set up tools
- Darkness or a changing bag for film loading
Steps to prepare
- Lay out all tools. Have everything ready before starting.
- Mix chemicals. Follow instructions on chemical bottles or packs.
- Check temperatures. Typically, 20°C (68°F) is ideal for black and white film.
Tips
- Label all containers and bottles.
- Keep a printout or notebook of timing and temps handy.
- Keep children and pets away during the process.
Once your workspace is ready, the process becomes easy to follow and even relaxing.
Loading the Film into the Developing Tank (In the Dark!)
This step must happen in complete darkness either in a light-proof room or using a film changing bag.
Steps to load your film
- Use a bottle opener to crack open the film canister.
- Gently pull out the film strip.
- Use scissors to cut off any bent or exposed film leader.
- Carefully feed the film onto the spiral reel.
- Put the reel in the tank and close it tightly.
Don’t worry if it feels tricky at first practice makes perfect. This is the hardest part for most beginners, but once it’s in the tank, you’re free to turn on the lights and work normally again.
Process Film (Black and White Film)
Now the fun part begins! Here’s how to develop black and white film.
Step-by-step timeline
- Developer: Pour into the tank and agitate (gently invert) for the required time, usually 7–10 minutes.
- Stop Bath: Pour in and invert for 30 seconds. This halts development.
- Fixer: Agitate for 5 minutes. This makes the photo permanent.
- Water Rinse: Wash several times to remove all chemicals.
- Optional Final Rinse: Use a wetting agent to prevent water spots.
Agitation Tips
- Agitate regularly every minute for even development.
- Tap the tank to release air bubbles.
Timing and temperature are crucial. If it’s too hot, development is too fast; if too cold, it goes slow.
Once rinsed and cleared, you’ll see your film real photo negatives!
Drying and Cutting Your Negatives
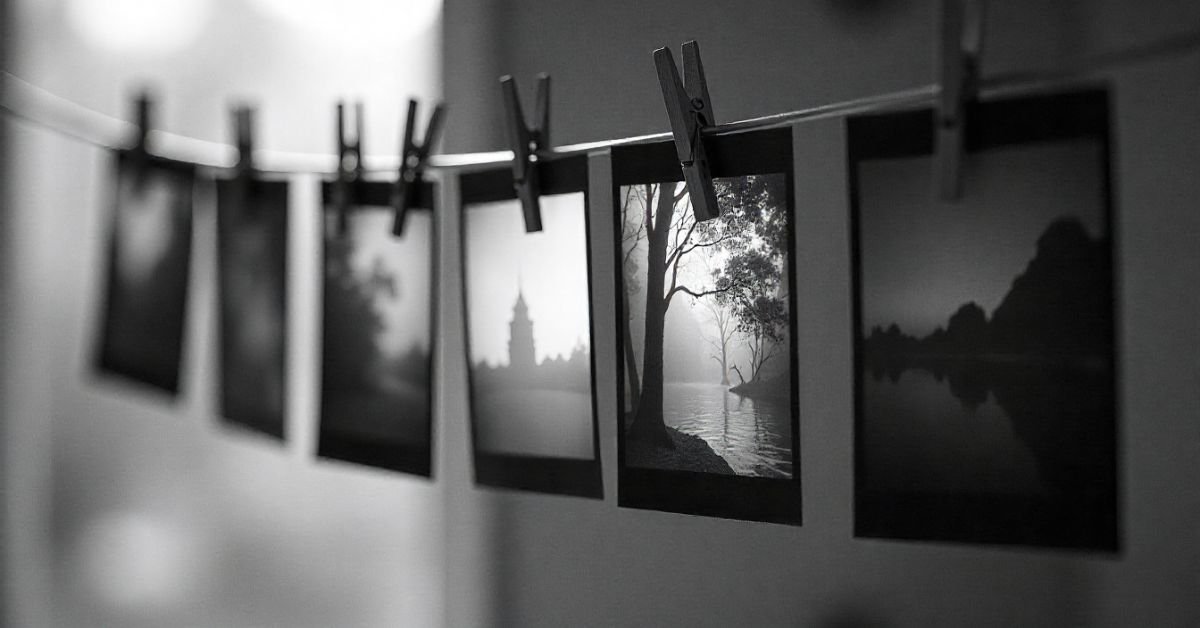
After developing, rinse your film and hang it to dry from negatives to beautiful photos-in-waiting.
Drying Tips
- Hang in a dust-free area (like a shower stall).
- Use clothespins or special film clips.
- Let dry for 2–4 hours.
Final steps
- Once dry, cut negatives into strips.
- Store them in archival-safe sleeves.
This keeps them flat and safe for scanning later. Avoid touching the film surface to prevent prints or scratches.
With a careful dry and store process, your images will last for decades.
Comparing At-Home vs. Lab Film Processing
Is home Process film better than using a photo lab? Let’s compare both.
At-Home vs. Lab Film Processing
| Feature | At-Home Processing | Lab Processing |
| Cost | Low after setup | Cost per roll adds up |
| Control | Full creative control | Limited to lab settings |
| Time | Slower, hands-on | Quick turnaround |
| Learning Value | High | Low |
| Equipment Needed | Yes | None |
When labs are better
- For color slides or E-6 film.
- When you want high-end scans or prints.
When home processing wins
- For black and white photography.
- If you want to experiment, save money, or learn.
Common Problems and How to Avoid Them
Process Film can come with beginner mistakes.
Typical issues include
- Blank film: Possibly due to underexposing or skipped development step.
- Bubbles or streaks: Caused by improper agitation.
- Dust or scratches: Occur during drying or handling.
How to fix and prevent
- Stick to proper timings.
- Always clean your tools and workspace.
- Use distilled water if your tap water leaves spots.
- Handle with clean hands or gloves.
Understanding these helps you improve with each roll. Mistakes are part of the learning experience!
Scanning and Sharing Your Film Photos Digitally
Once your negatives are ready, how do you turn them into digital files?
Options for scanning film
- Film scanners (e.g., Plustek, Epson)
- Flatbed scanners with film holders
- DSLR camera + light board setup
- Photo labs (they scan for you)
Recommended software
- VueScan
- SilverFast
- Negative Lab Pro (for Lightroom users)
Once scanned
- Edit for brightness, contrast, and dust removal.
- Share on social media or print your images.
Scanning gives new life to your analog shots in a digital world.
Color Film and Alternative Processes
Once you’re comfortable with black and white film, try color film. The C-41 process is next, followed by advanced methods like slide film or homemade developers.
C-41 Basics
- Uses color-specific chemicals.
- Temp control is more precise (38°C/100°F).
- Kits are available for home use.
Alternative methods and styles
- Caffenol: Developer made from coffee!
- Cross-processing: Using E-6 chemicals on C-41 film to get cool results.
- Expired film: Adds funky, vintage tones.
Film is both a craft and a creative playground.
FAQs
Can I process any film at home?
Most black and white films are easy at home. Color film requires precise temps but is possible with practice.
How long does it take to develop a roll?
About 30–45 minutes from loading to finished negatives.
Is it safe to pour chemicals down the drain?
Check local regulations. Some chemicals should be neutralized or properly disposed of.
Can I reuse the chemicals?
Some, like fixer and stop bath, can be reused a few times if stored correctly.
What’s the cheapest way to start developing film?
Start with black and white film, get a starter kit online, and use household items for measuring and drying.
Conclusion
Learning how to process film at home is a fun, rewarding skill that connects you to photography in a deeper way. With a few reusable tools and some patience, you can turn your exposed film into beautiful negatives ready to scan, print, and share.
You’re not just saving money you’re gaining full creative control over your photos. It’s a hands-on way to explore photography, learn the science behind it, and slow down in a digital world.
Whether you’re a total beginner or looking to grow your analog skills, film processing opens a new world of photography. So grab a roll, shoot with intention, and start developing today!